What do you do with your new website after you’ve purchased web hosting?
You probably spent a lot of energy figuring out your niche. And then you focused on really great names for your new website. You wanted the site name to reflect your niche but also be easy to remember. And, well… cool. ?
You registered your domain (your new website) name and you purchased your web hosting.
How do you make that a website? What are the next steps?
New Website Next Steps
Before you can begin creating all your wonderful content, you need some basics in place.
- WordPress installation and set up – think of WordPress as the building blocks for your new website
- Domain name server settings – ensure others can access your site
- Accessing your site components – your website is more than just WordPress
WordPress Installation and Set Up
WordPress contains the building blocks for your site. Consider it the foundation on which all your creativity can be leveraged.
So your first step is to install and set up WordPress.

WordPress Setup Steps
1. Login to your Bluehost account
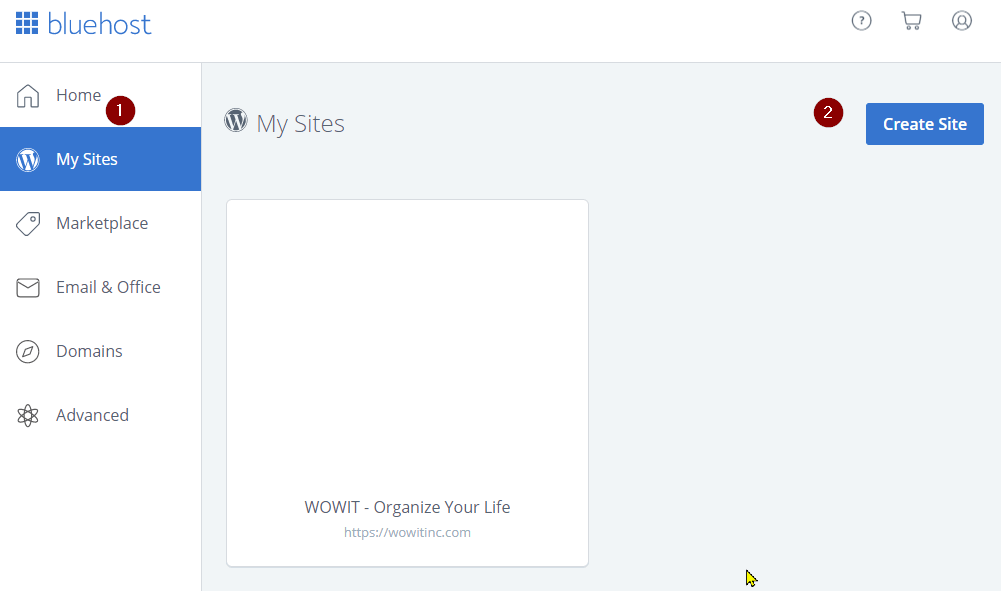
2. On the left navigation panel, click “My Sites” and then “Create Site”
NOTE: When you first access your account, there won’t be any sites listed under “My Sites.”
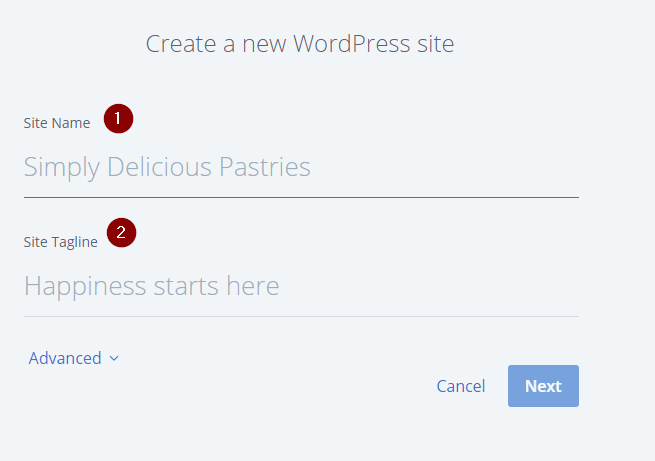
3. In the “Site Name” field, enter a name for your site. This is not the same as the domain name. More like a phrase you might use to refer to your site.
Also, enter a tagline in the “Site Tagline” field. For example, the tagline for my site is “Organize Your Life.”
NOTE: Not to worry – you can change these anytime.
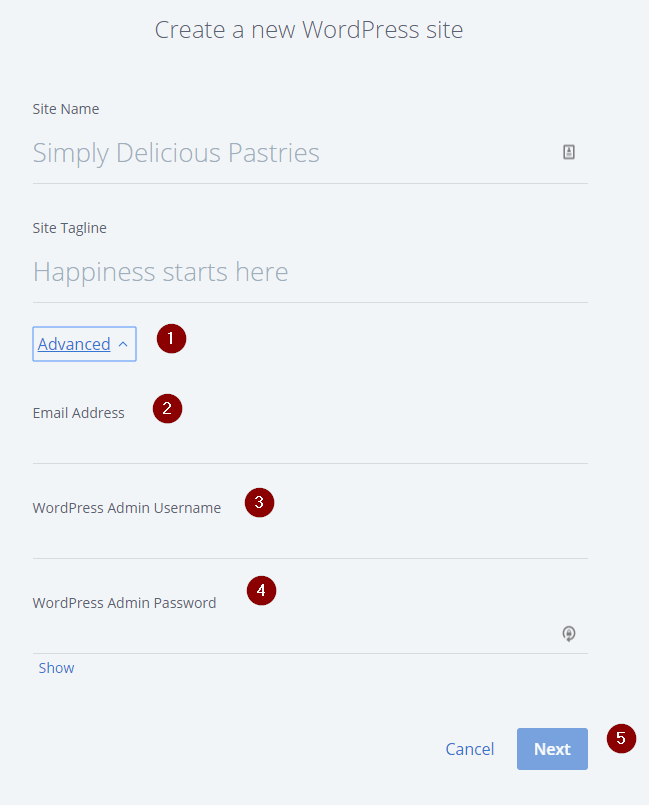
3a. OPTIONAL – Click on the “Advanced” link to expand that section. By default, the WordPress login for your site will be the same as your Bluehost account login.
I recommend you make them different by entering your email address, choosing a WordPress admin username and entering a password in this section.
And, do NOT use “ADMIN” for your username – that’s what every hacker tries first. ?
Then click “Next.”
4. Select your domain from the “Domain” drop-down and click “Next.” Don’t bother with the plugins as you can select those later.

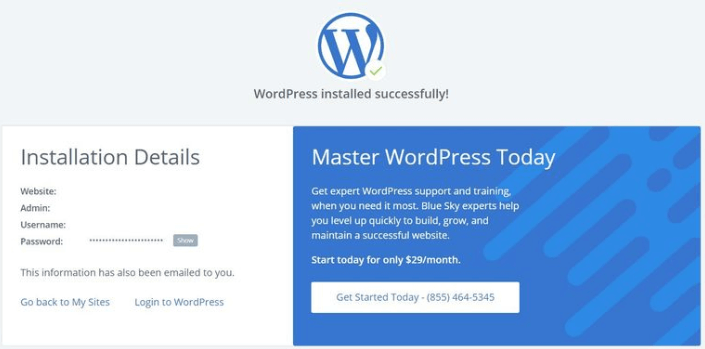
That’s it – WordPress is now installed.
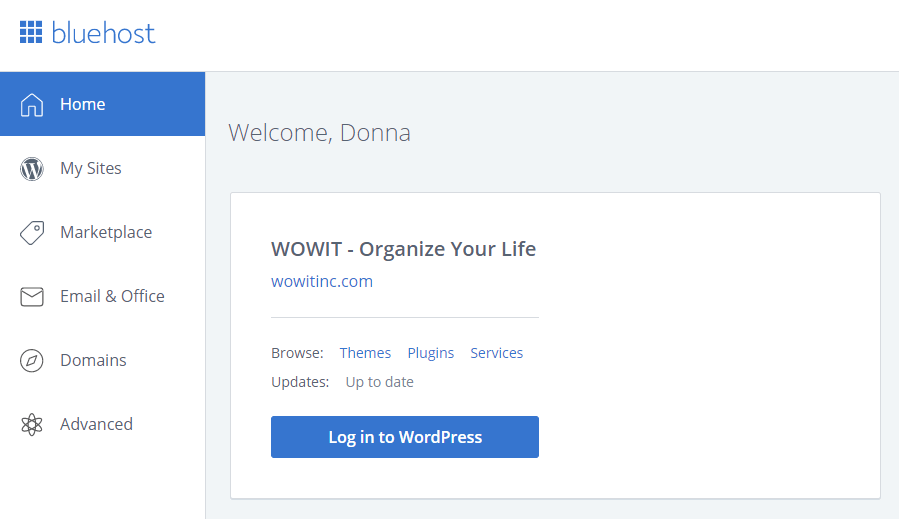
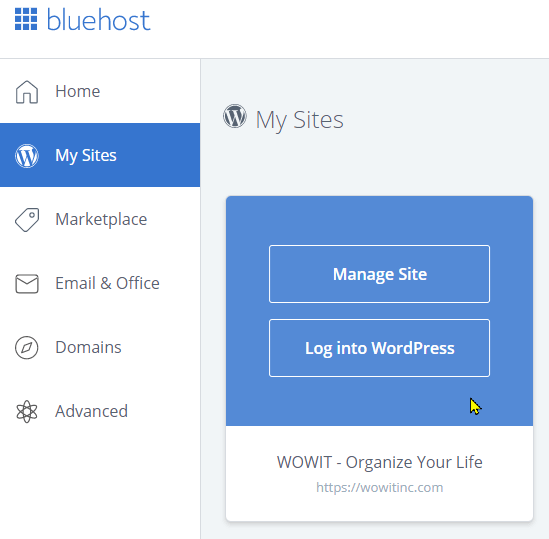
If you return to your Bluehost account, then after login, from both “Home” and “My Sites” you should now see your new website name, tagline, and domain.

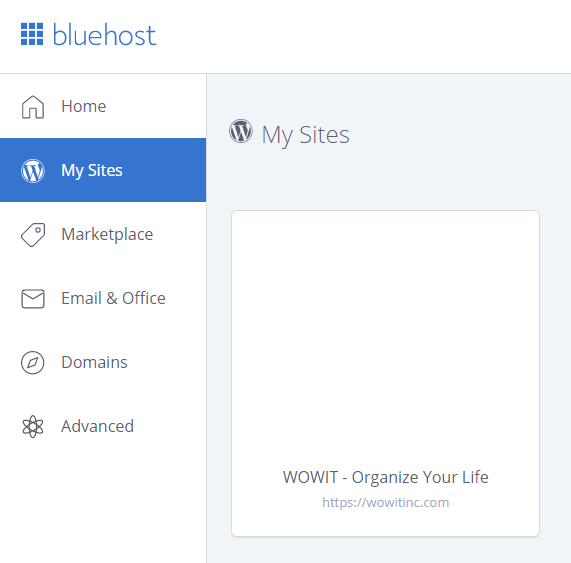
From “My Sites”, if you hover over your site, you’ll see buttons to click.
New Website Domain Name Server Settings
If you used a domain provided by your hosting provider then you can skip this section. But if you purchased your domain separately, then READ ON!
You need to ensure your domain (website name) is linked with your web hosting provider so people can see your site.

Hosting Provider Steps
My example outlines the steps using Bluehost. The steps will be similar for other hosting providers. If you see substantial differences then please contact your own hosting provider for detailed instructions.
1. Login to Bluehost and from the left navigation panel select “Domains”
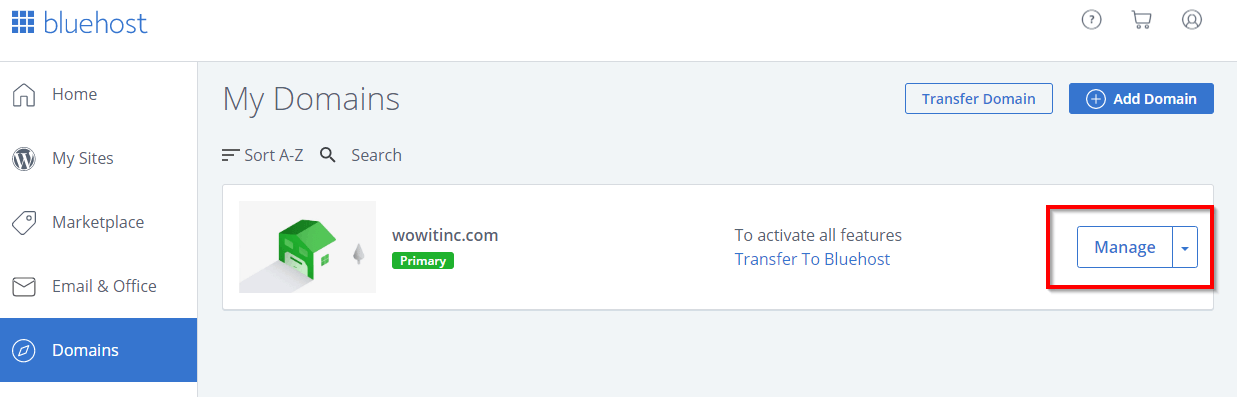
2. From your selected domain, click “Manage”
3. In the “Name Servers” section you’ll see two references below the “Name Servers” title. These are the Bluehost name servers and the default is typically ns1.bluehost.com and ns2.bluehost.com.
The IP addresses associated with your account make them unique. I’ve masked the screenshot IP addresses for security purposes. ?
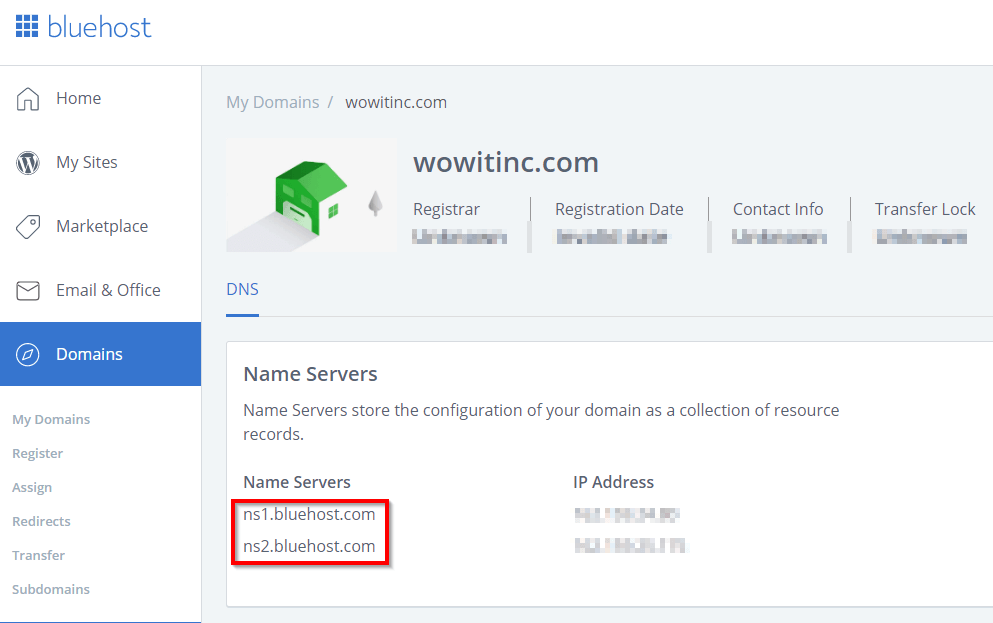
Leave your Bluehost account open to this section.
Domain Provider Steps
My example outlines the steps using Namecheap. The steps will be similar for other domain providers. If you see substantial differences then please contact your own domain provider for detailed instructions.
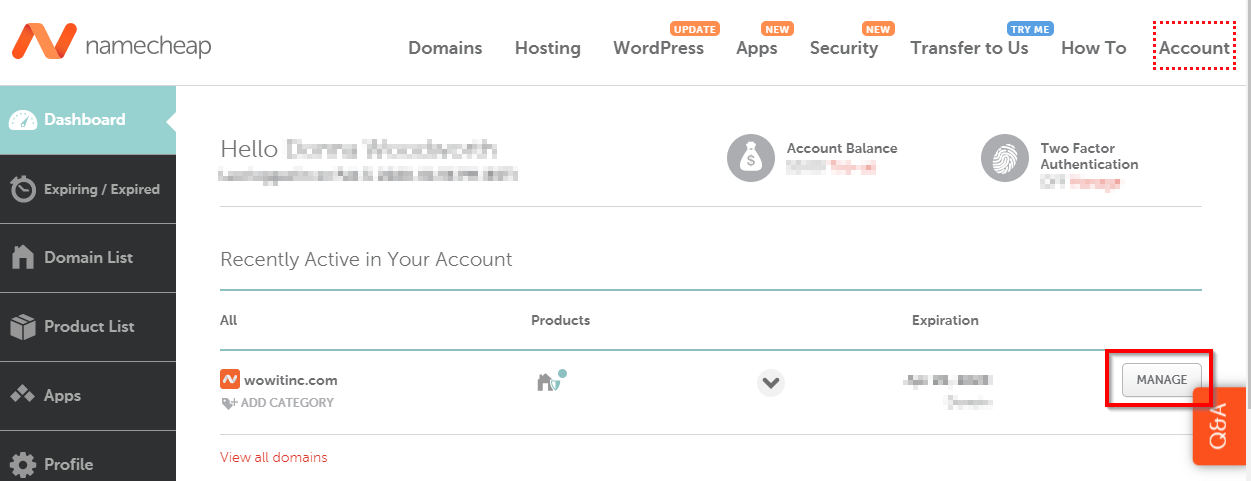
1. Login to your Namecheap account and click “Dashboard” from the left navigation panel. Click “Manage” next to your domain.
2. In the “NAMESERVERS” section, click the drop-down (the default selection will likely be “Namecheap BasicDNS”) and choose “Custom DNS”
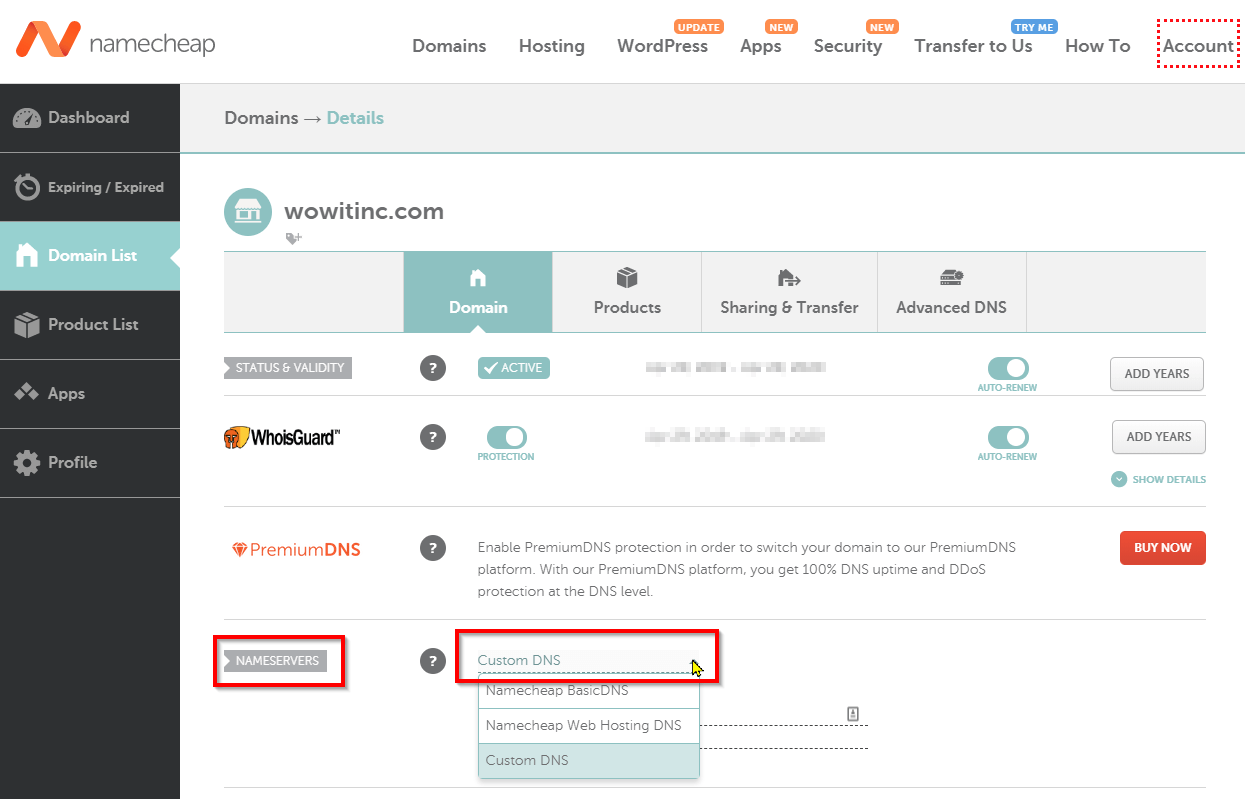
3. On the two lines below the “Custom DNS” selection, enter the Bluehost nameservers. 1) On the first row: ns1.bluehost.com 2) On the second row: ns2.bluehost.com 3) Then click on the green checkmark to save your entries.
NOTE: Do NOT use the IP addresses here.

Now you need to wait for name server propagation. All the nodes around the world need to refresh their cache before your update is fully known. This could take up to 24 hours or more.
Accessing Your New Website Components
Thus far, you’ve accessed your Bluehost account. But now you also have a WordPress account for your site. What’s the difference?
Hosting provider account
When you access your Bluehost account you gain access to the “back-end” of your site. Many people refer to this as the cPanel access.
Your cPanel gives you access to all the files that comprise your website: files, images, database tables, website email accounts settings, site statistics (metrics), site security information, site software, etc.
These are like the engine components for your website. You should exercise caution when making updates through your Bluehost account.
Your Bluehost account is available through your account login at: my.bluehost.com.
Website WordPress Account
The WordPress account for your website is where you’ll likely spend most of your time. Your WordPress account provides access to the elements you display to viewers.
Things like: navigation menus, pages, posts, links, buttons, forms, etc.
These are still “back-end” elements in that the viewer doesn’t see them. But they’re more related to your site content than your site functionality.
There are two ways you can gain access to your WordPress back-end:
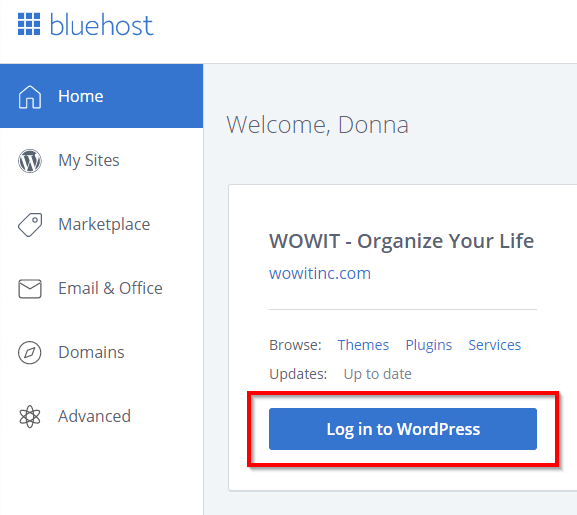
1. Through your Bluehost account:
When logged in, from the “Home” page, click “Log in to WordPress” on your domain.
2. Direct URL
From a browser, enter your website domain followed by “/wp-login.php.” For example, if your site domain was “www.myexampledomain.com” then you could use “www.myexampledomain.com/wp-login.php” to login directly to WordPress.
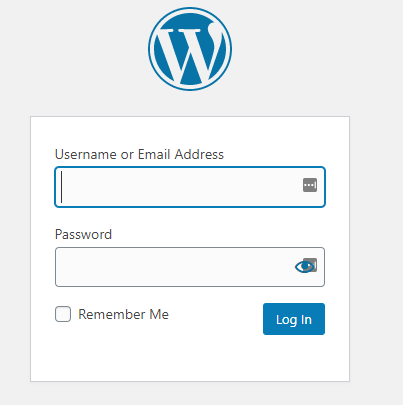
There are a few other options instead of “/wp-login.php”:
- /login
- /admin
- /wp-admin
Most of the above will also work, depending upon your hosting provider. They simply redirect to “/wp-login.php.”
This saves you an extra login step plus ensures you’re not accidentally logged in to an account with too much power. ?
Ready for Content
And now you’re ready for content!!!
You have a domain and a web hosting provider. And you’ve now completed your WordPress installation.
You’ve ensured your domain is communicating with the hosting provider. That way, people can see your site!
Plus, you understand the difference between the hosting provider cPanel access (your website engine functionality) and the WordPress account access. WordPress being your content access for your pages, posts, etc.
And you even have a handy “shortcut” to access your WordPress account. Instead of going through your hosting provider account.
I’ll be writing another post to walk through all the interesting WordPress settings for your site!
Like This Post? Put a Pin On It!
Did you find this article useful and helpful?
Share this WOWIT post on social media!
Have some suggestions of your own?
Click the Submit Comment button below to let us know!
Want More?
Would you like to learn more about this topic? Or perhaps explore some other topics? Choose from one of the categories below to see more:
Subscribe to our newsletter to have information delivered right to your inbox.