How do you signup for web hosting with Bluehost?
You’re ready to signup but it’s your first time and it’s a little nerve-racking.
In a previous article, I outlined how to set up your blog domain through Namecheap. Throughout this article, I’m going to assume you already have a domain name.
I also wrote an article to help you decide which hosting provider might be best for you, Factors to Consider When Choosing a Web Hosting Provider.
SPOILER: I use Bluehost. That’s what I recommend. And that’s what I’ll be outlining in this article – setting up web hosting with Bluehost.
This is an exciting step. Once you have your web hosting available, then you can start posting to your blog!
Okay… there are a few more steps after that. But that’s pretty cool.
So let’s get you there!
Preparation before you signup
Get your domain name
Let me be clear – you don’t have to purchase your domain separately from your hosting provider. But I recommend you do.
Later on, if you want to move to a different hosting provider, for whatever reason, then you don’t have to worry about your domain name. You already own it separately.
Determine your commitment
Most hosting providers offer you different term lengths. Typically, between one and three-year terms for hosting plans.
Also, most hosting providers substantially increase their renewal rates from the initial introductory rates. So you’ll save more money, in the long run, if you choose a longer introductory hosting plan term.
There’s another benefit in choosing a longer term plan. When you know you’ve already paid for three years, you might as well keep going for that entire period.
This incentive may be all some people need to keep them moving toward building their online presence. ?

Confirm your availability
If you’re about to get very busy with some other project – for example, a home renovation. Then perhaps now is not quite the best time to kick-off your new online business.
On the other hand, maybe you thrive in that sort of high-intensity, challenging environment.
Know yourself and work within your strengths.
I don’t want you to waste money on web hosting with Bluehost if you can’t kick it off for six months. Use your money wisely.
Get your credit card
You’ve read all of this and you’re certain you’re ready. Then grab that credit card and let’s signup!
Step-by-step
Don’t like video? Read the text instructions below.
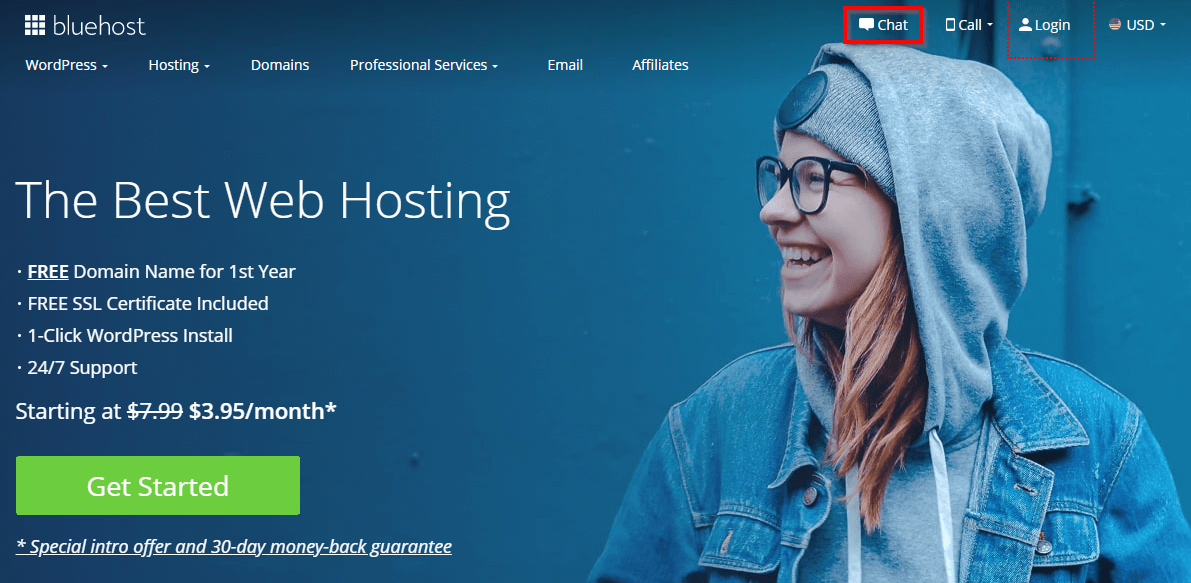
1. Access Bluehost
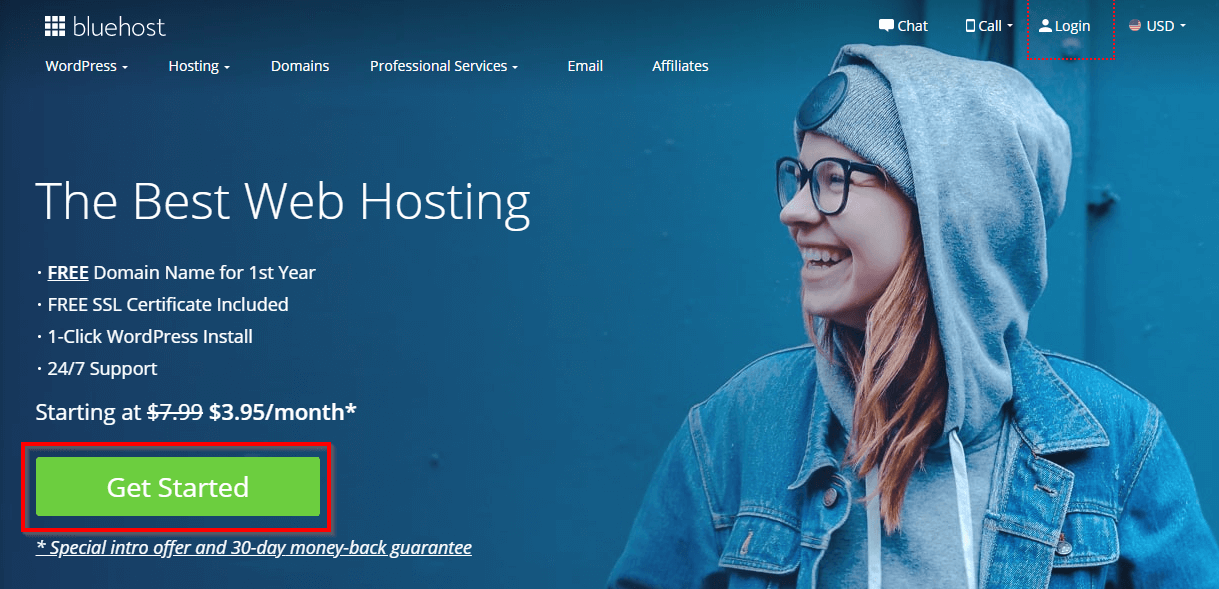
2. Get Started
From the home screen, click the green “Get Started” button.
3. Choose a plan
I recommend starting with the Basic (the most inexpensive) plan for web hosting with Bluehost.

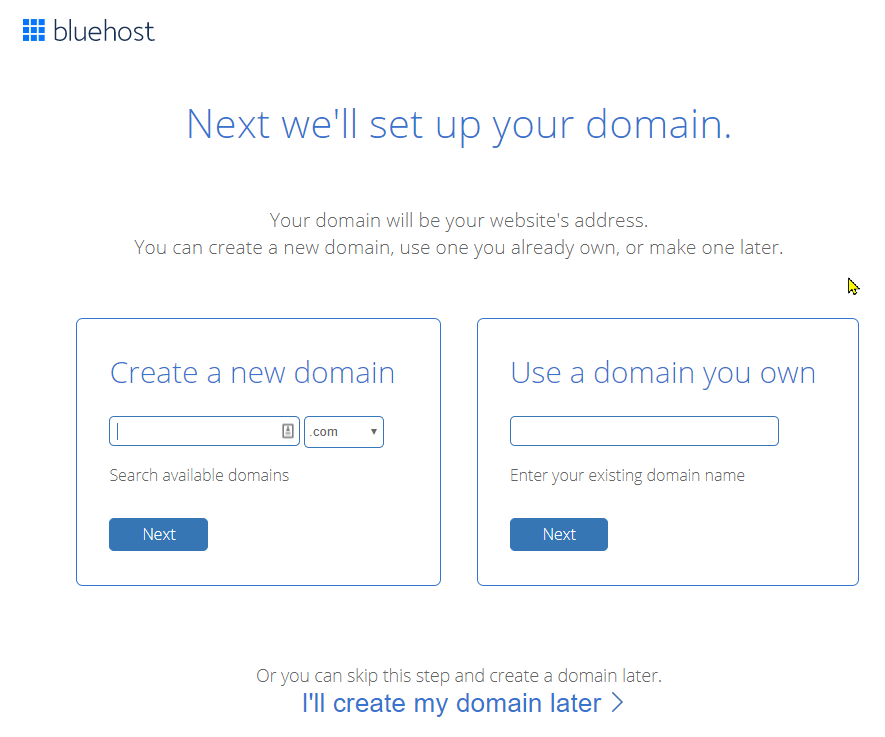
4. Choose your domain option
Bluehost has three options for you:
- Create a new domain – if you have not already purchased your own domain, you could enter your choice here and let Bluehost include this in your hosting package
- Use a domain you own – if you have already purchased your domain, then enter the name here and Bluehost will use this to create your hosting package
- Wait until later to create your domain – you can choose this option to set up your hosting and figure out the domain later
I recommend you choose option 2 – purchase your domain BEFORE you purchase your web hosting. And I recommend setting up your domain with Namecheap.
But that means you’ll need to have your domain purchased and available BEFORE you proceed.
5. Create your account page
If you entered a domain under “Create a new domain” on the previous screen then you’ll get feedback at the top of this page.
You want to see a big green swatch – looks like a big green button. This would confirm your selection is available.
If it isn’t, then choose a different domain or a different extension or both. Keep trying combinations until you find one that’s available.
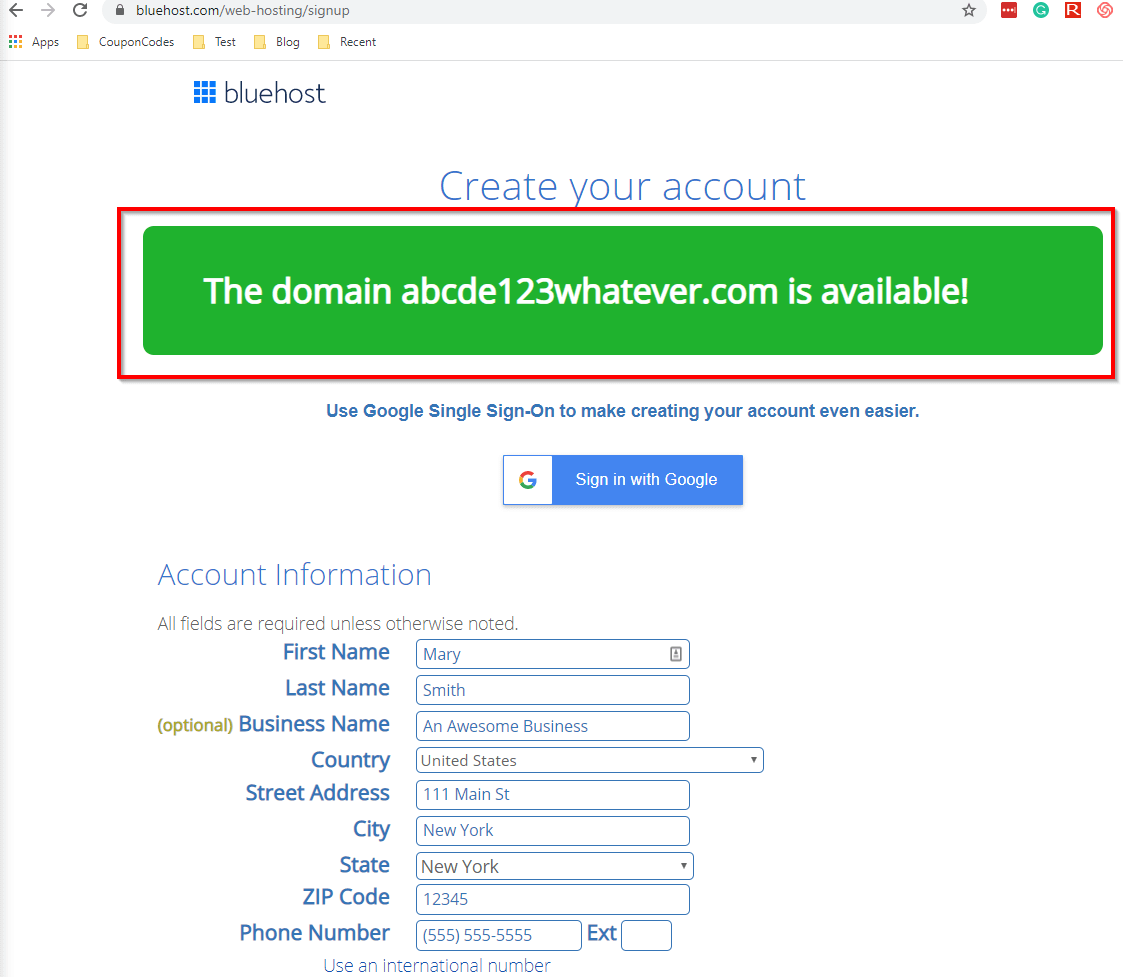
6. Enter Account Information
It’s important you enter your real credentials here – no fake addresses or phone numbers. The screenshot below is strictly for demo purposes.

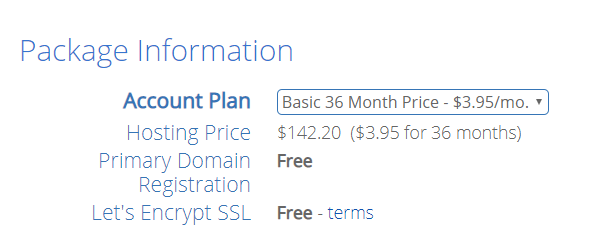
7. Package information
The cheapest rate is the introductory rate so you want to lock in that introductory rate for as long as possible. That’s typically three years.
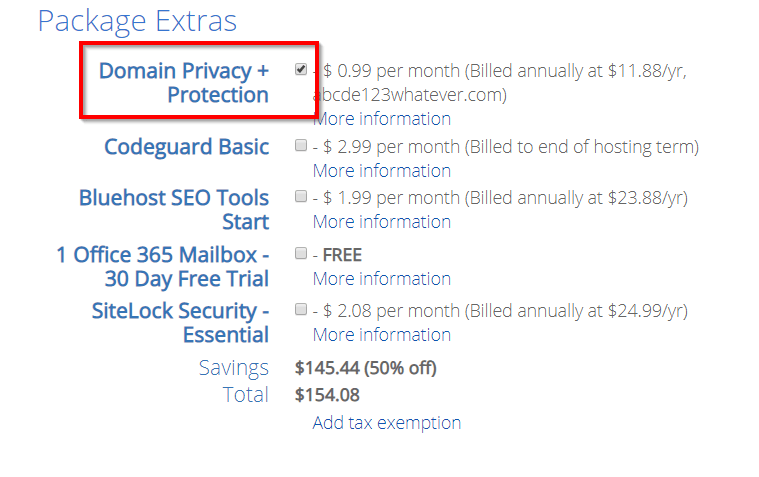
8. Package extras
Bluehost already has a number of options pre-selected for you. A
I recommend you de-select all those extras except for one: Domain Privacy + Protection. You can always add more later.
Domain privacy ensures your contact information (name, address, phone number, etc.) in the world WHOIS database is private. Anyone can access the WHOIS database so you want this protection!
9. Payment
All that’s left is your method of payment, confirm you agree with their terms, and hit Submit.


As with most sign-ups these days, you’ll need to confirm your email address. Then your hosting is available within a few minutes.
Although, if you also used their free domain (you did not purchase your own domain in advance), then you’ll need to wait anywhere from one hour to 48 hours.
They’re pretty fast in most cases.
Confirm your setup
Once you’ve received all your credentials (via email), please take a moment to confirm access. You’ve put the effort into setting up your web hosting with Bluehost, make sure it’s ready to work for you!
And don’t start this if you’re in a rush. You want to take your time to ensure you understand what you’re seeing. In fact, some of my next articles will provide more insight into next steps.
For now, just ensure one thing – you can login to the Bluehost backoffice. These are the administrative credentials they gave you via email.
If you took advantage of the free domain name with Bluehost then you could also check your site. But only after the domain has been propagated – typically within 48 hours as mentioned above.
Type your site name in a browser. You should see the default screen “A New WordPress Site Coming Soon!”
If you set up your domain separately, then you’ll first need to adjust your name server settings. Read this article for more information about name server settings and other next steps.
After that adjustment, then you can try entering your site name in a browser.
If you have trouble with either of these activities then use the Bluehost live chat right away. After all, it’s good to get accustomed to it. It’s your best friend now.
From the main Bluehost site, you’ll see the chat in the upper right-hand side.
Ready for business
Congratulations. You’ve successfully set up a domain and a hosting service for your website. You’ve registered for web hosting with Bluehost.
Be certain to keep your domain and your hosting provider information in a safe and secure place. You might need this information for later support.
Specifically, take note of both the domain and the hosting plan you purchased. You want to save the price you paid, the type of plan, the length of the plan, and the renewal date.
The renewal date is especially important. Put that on your calendar. And save yourself some grief – login to the administration area of your account(s) and set up automatic renewal.
All you have to do now is start setting up your site. I’ll be posting many, many more articles on that going forward!
Like This Post? Put a Pin On It!

Did you find this article useful and helpful?
Share this WOWIT post on social media!
Have some suggestions of your own?
Click the Submit Comment button below to let us know!
Want More?
Would you like to learn more about this topic? Or perhaps explore some other topics? Choose from one of the categories below to see more:
Subscribe to our newsletter to have information delivered right to your inbox.